This post may contain affiliate links. As an Amazon Associate I earn from qualifying purchases. Please read our disclosure policy.
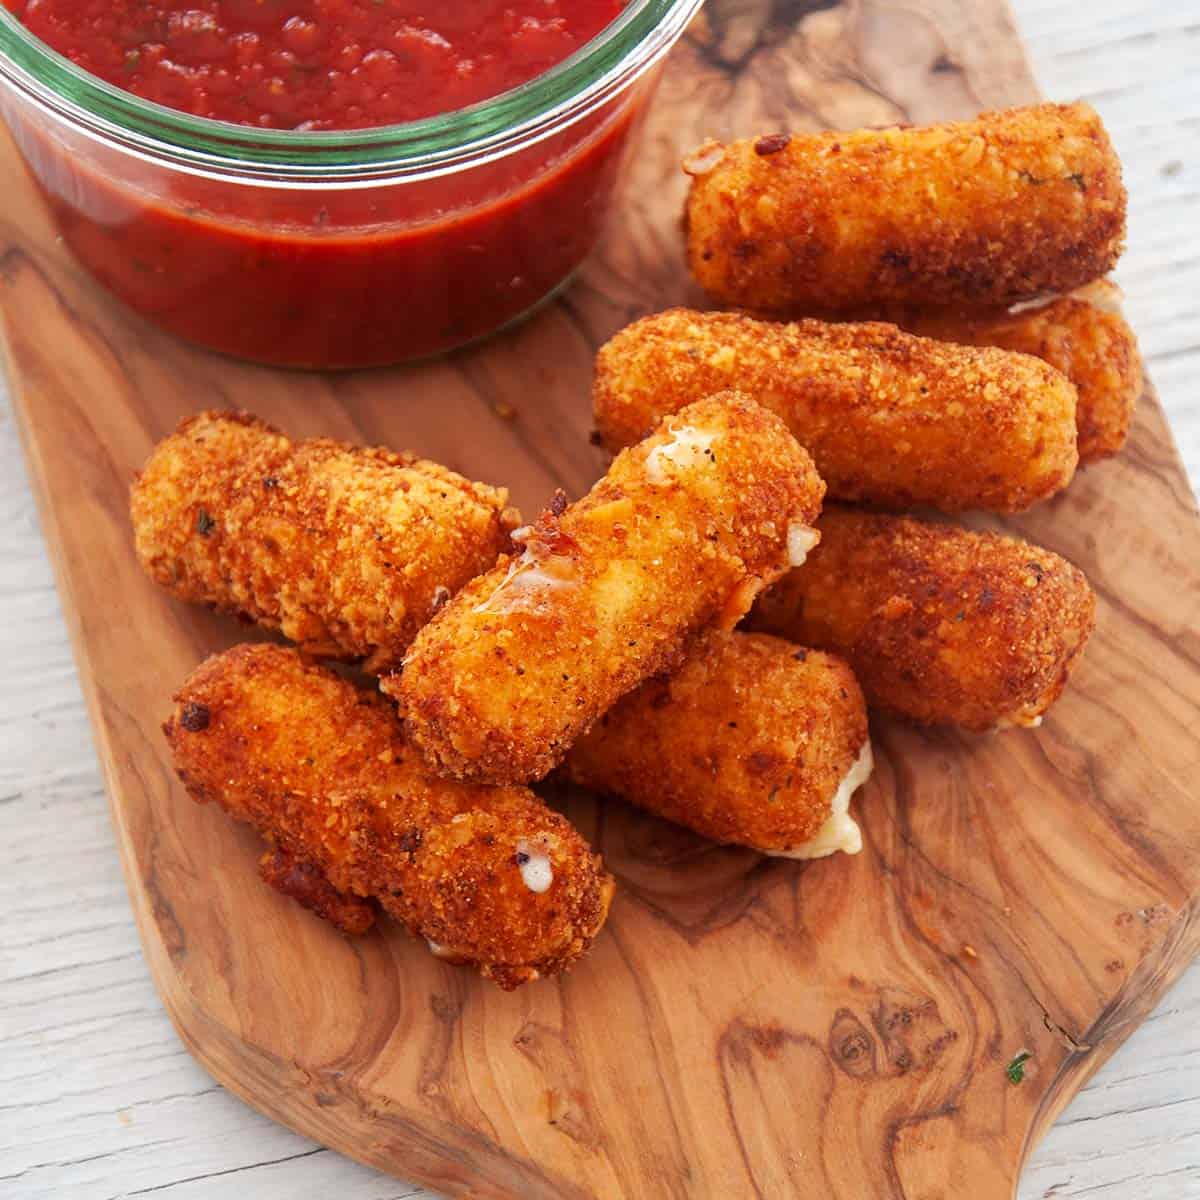
These Cheez-It® Fried Cheese Sticks give a mouth full of warm, melting, creamy cheese covered with the flavorful crunch of a delicious Cheez-It® breading. These gooey appetizers cook in just a few minutes and don’t need more than 15 minutes of preparation.
If you are looking for a great Cheese Sticks recipe that is slightly different and provides wonderful Cheez-It® flavor, give this recipe a try.

🧀 What makes this recipe special?
Cheese sticks are always a good appetizer or snack, but a few other things are great about this recipe. You can prep them ahead of time and keep them in the freezer until you are ready to cook.
Also, if you are a fan of Cheez-Its®, you have to give this a try! This recipe stays true to cheese sticks but presents a distinct Cheez-It® flavor for anybody that loves these little crackers or wants to try something different.
If you are looking for other appetizers for your party, consider these Sweet and Spicy Dry Rub Wings, Cheesy Fried Pickles, or these awesome Hawaiian Roll Baked Pizza Sliders. Whatever you make for your next appetizer or Super Bowl gathering, make sure to treat yourself!
🥖 Ingredients
There is not much to these little appetizers. Here is what you will need:
- String cheese
- Water
- Cheez-It® crackers
- Italian bread crumbs
- All-purpose flour
- Eggs
- Oil, for frying
See the recipe card for quantities.
Why Use Cheez-Its®
I cook with Cheez-Its® because I can! Not too long ago, I was stuck in my house and was delivered a care package full of goodies. Cheez-Its® was a part of that gift basket of treats, and I really enjoyed them.
That stuck with me. As I started to get hungry for cheese sticks, I wondered how this would work. I did try just Cheez-Its® as the breading.
They were good but adding a bit of Progresso Italian Breadcrumbs really sealed the deal for me. This recipe turned into a snack that I really enjoy.
Italian Breadcrumbs
I decided to add some Progresso Italian Breadcrumbs as the Cheez-Its® alone needed a bit of help. Italian is excellent, as it has an assortment of flavorings and herbs that put a nice finishing touch on these cheese sticks.
You can use other breadcrumbs or even omit them. I think my recommendation, however, provides the best flavor and consistency while giving a bit of that tasty Cheez-It® flavor.
🍲 Instructions
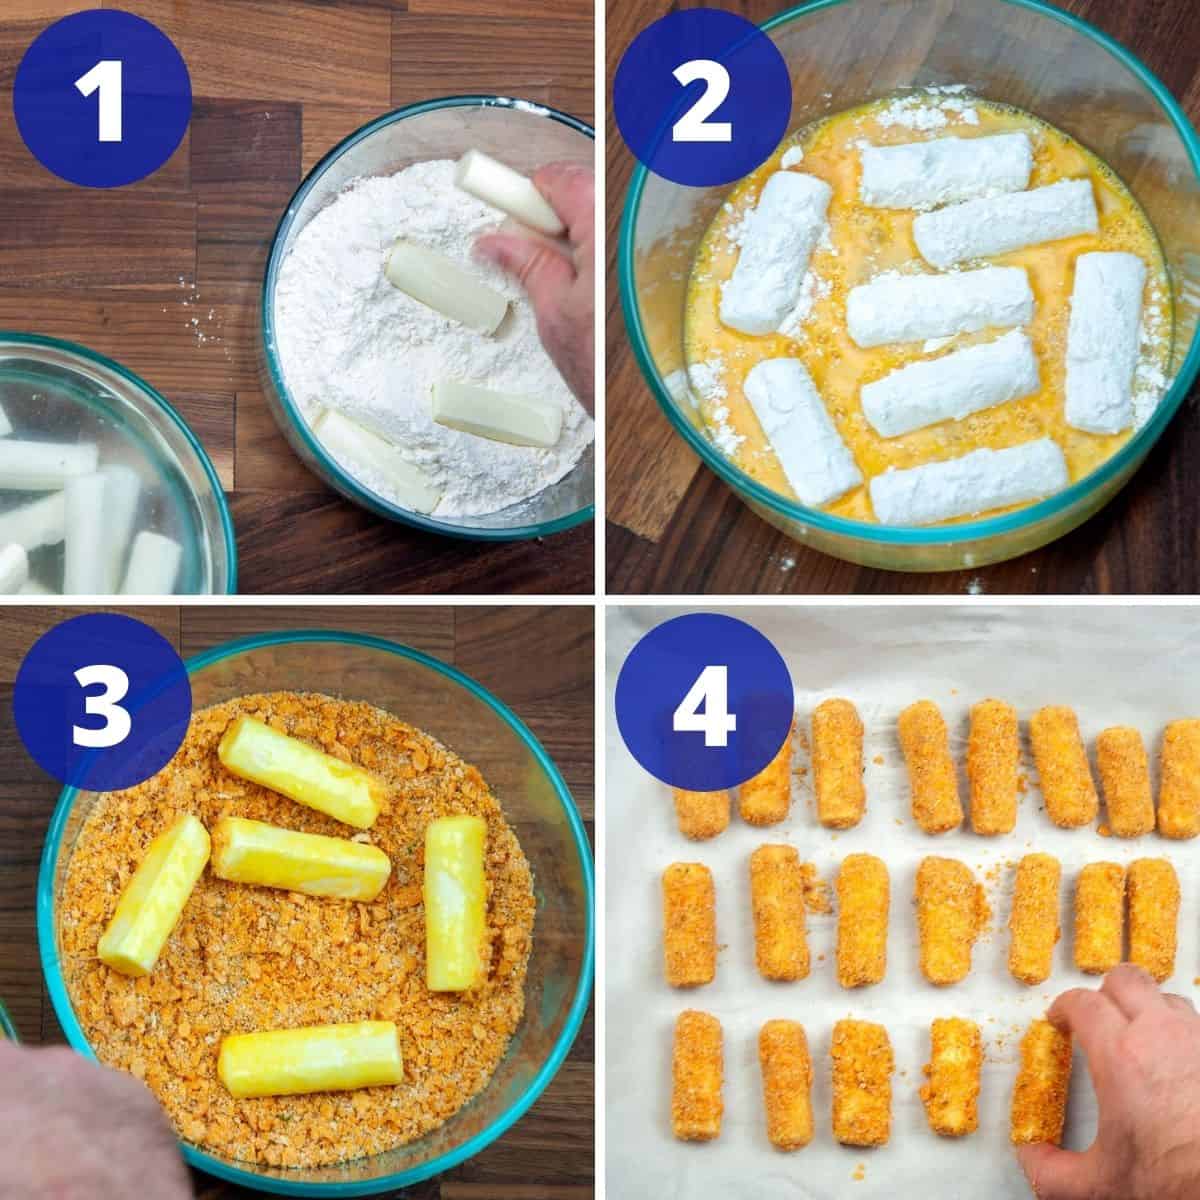
If you have ever dredged anything for frying, this should be a simple recipe. This recipe uses standard mozzarella string cheese that kids eat for snacks every day. After cutting them in half and placing them in water, we start the dredging process.
First, they go from the water into all-purpose flour and coat just so that everything is covered. From there, we give our cheese sticks a dunk in the egg.
After the egg, place them in the Cheez-It® coating previously put together. This is as simple as crushing a few cups of Cheez-Its® in a food processor (or cooking mallet). Combine with some Italian bread crumbs. That is all there is to the breading.
They are not ready for frying, as they must be frozen. It becomes a fryer full of a gooey mess if fried straight away. Place the prepared cheese sticks on a piece of parchment paper and put them in the freezer for at least two hours. They can be kept in the freezer until ready to cook.
When ready to cook, they go into hot oil raised to 375° Fahrenheit for about 1 ½ minutes. They should be golden brown when done. They also might be done a bit sooner, but you should be able to see and hear when they are done.
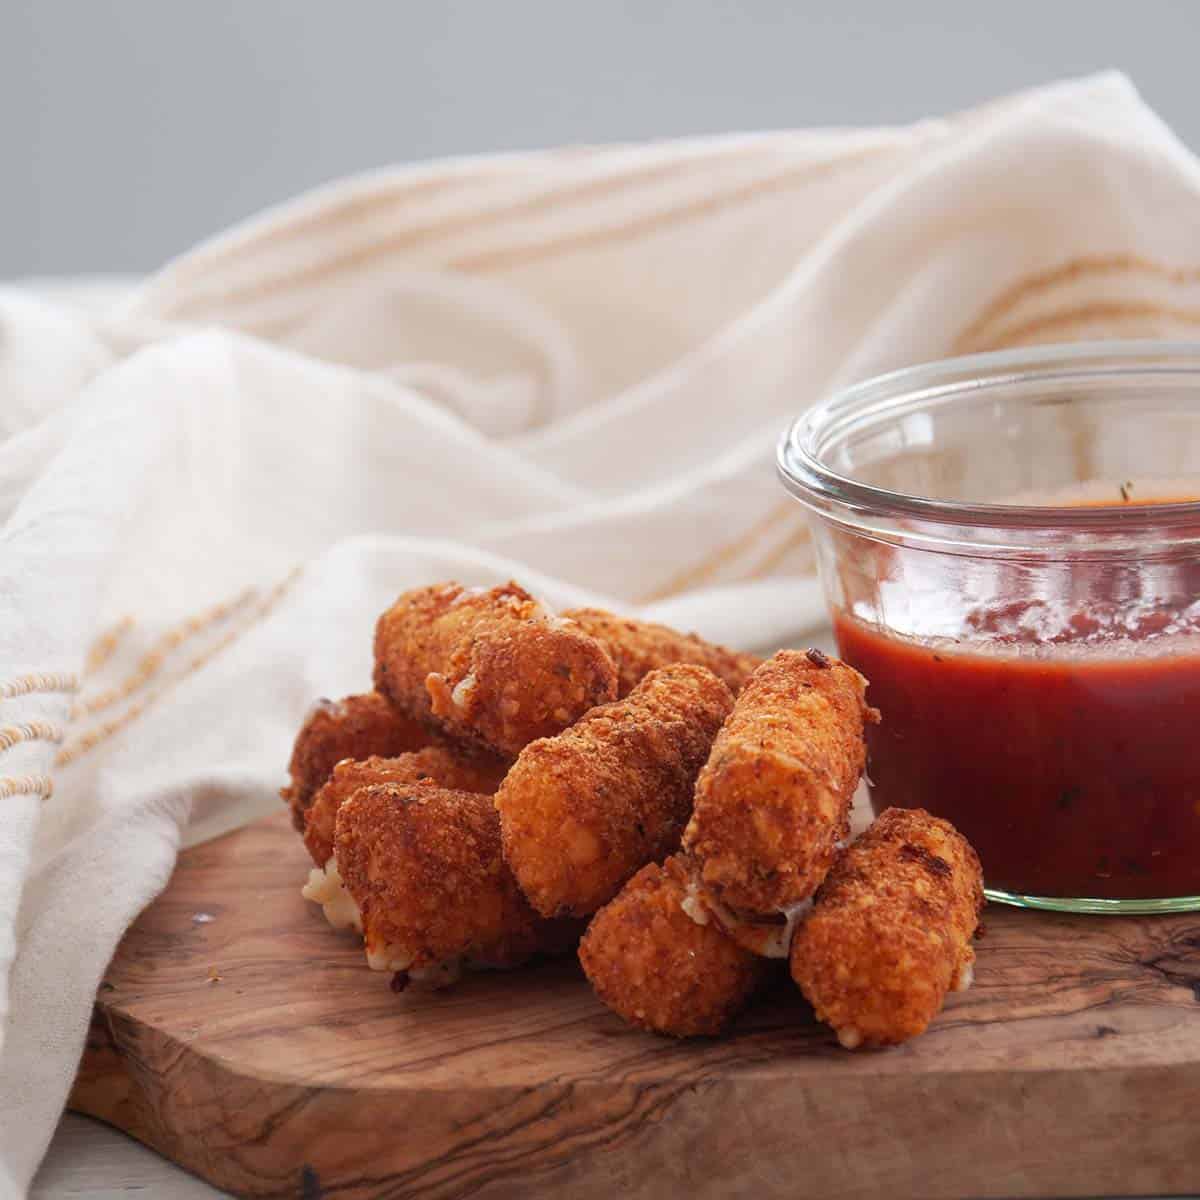
Serve them with your favorite marinara sauce or any sauce you like with cheese sticks. Marinara or tomato are great, but I love a bit of Ranch dressing on my cheese sticks.

Dredging Cheese Sticks
The purpose of dredging the cheese is to provide a way for the breading to stick to the cheese. Water allows the flour to stick to the cheese sticks. Flour allows the egg to stick better, and the eggs allow the breading to stick. In combination, they are all needed to make a great cheese stick.
Why Freeze Cheese Sticks Before Freezing
Cheese sticks melt when they are hot. It is that simple! They melt all over the place if you just add them to a deep fryer without freezing them
Giving them some time in the freezer will allow you to fry them. A chilled center allows for enough cooking to create a crumbly golden brown coating and a warm gooey middle.
When Are Cheese Sticks Done Frying?
They shouldn’t take long, and my instructions indicate 1 ½ minute of cooking time at 375° Fahrenheit. That said, it is good to pay attention to the cheese sticks.
When done, they should be a nice golden brown. You might see the cheese start to leak out of the stick, which indicates that your cheese sticks are close to, if not done.
You also might hear cheese leak into the oil. This is another indicator that they are nearing done.
Keep an eye and ear on your cheese sticks. You don’t want too much cheese to leak out. You don’t want them to be burnt, either. About 1 ½ minutes should be enough to heat up appropriately at 375° Fahrenheit.
I spent many years as a line cook, so I have my fair share of experience cooking cheese sticks. The look and sound are a great indicator of when they are done. If you let them go too long, you will have a bit of a gooey mess. Still, it is fried cheese. Even if overdone, it is pretty challenging to get fried cheese wrong.
🤷 Substitutions and variations
There are a few ways that this can be changed up.
- Flavored Cheez-Its – While I have not made this with other flavors of Cheez-Its, I imagine you could do this with any product in the Cheez-Its family.
- Oil – Use any oil that is appropriate for frying.
- Breadcrumbs – Really any breadcrumb could be used, but I like the seasoned Italian ones.
- Dipping Sauce – Don’t use any at all or use whatever you like!
📦 Storage
They can be refrigerated in an airtight container or freezer-safe bag for up to several days or in the freezer for up to several months. These store really well in the freezer and then I just heat them up in the oven when ready to use.
🎓 History Tidbit
You might be surprised to learn that cheese sticks have been around as early as the 1300s. They might not have been entirely in the same form, but apparently, the idea of fried cheese is a popular one. They appeared in a 1393 book called Le Ménagier de Paris, and this is a translation of the book and appears under the listing for Pipefarces.
Modern cheese sticks became more popular as string cheese took hold in the 1970s. Baker’s cheese claims modern string cheese as something they invented. Although, if I know anything about food history, there might be someone out there who has their claim to ‘first.’
Modern string cheese made our modern cheese sticks much more reachable and familiar to home cooks and bar snackers, alike. Today, cheese sticks are served all over and in major chains.
❓ FAQ
Mozzarella. That said, cheese sticks are made from string cheese, which is mozzarella that has been stretched and formed in a certain way. This recipe is not meant for fresh mozzarella or blocks of mozzarella.
where cheese sticks and mozzarella sticks have been stretched out to form the strings in the underlying string cheese.
I highly recommend cutting the string cheese in half. If you don’t, you may need to adjust cooking time and get unpredictable results.
Absolutely, but I liked the Progresso Italian Breadcrumbs for this recipe. It provides both the consistency I like and herbs that complement the Cheez-It® flavor.
Your favorite tomato or marinara sauce that has been heated up works great! I also like ranch dressing on these. You could also make your own quick marinara sauce with canned chopped tomatoes, dried Italian herbs, garlic powder, and onion powder that has been mixed well. I advocate for using fresh ingredients, but cheese sticks are often a convenience recipe, so whatever works well for you!
Yes. I would suggest 15 minutes at 400° Farhenheit and place them on parchment paper.
📝 Tips and tricks
- Always remember safety first and to check out the food safety instructions from the USDA.
- Use Mozzarella String Cheese and not fresh mozzarella or block mozzarella.
- Make sure to freeze for at least 2 hours before frying.
- You can bake these instead of frying, although they won’t be quite as crispy. I would suggest 10 minutes at 400° Farhenheit and place them on parchment paper.
- These are great for preparing beforehand. Once frozen, just place them in a freezer bag and cook when you are ready to try.
- Canola oil, corn oil, peanut oil, and sunflower oil are all appropriate for this. Any oil that has a high smoke point and can be used for deep fat frying.
- I estimated both the amount of oil that is absorbed and how much of the breading actually ends up on the cheese sticks.

🛠 Products used in this recipe
😋 Did you make this recipe?
That is awesome, and thank you so much for giving this Cheez-It® Fried Cheese Sticks recipe a try. If you could leave a rating in the comment area below, it would be greatly appreciated. This lets me know how I am doing and also helps others decide if they want to make this recipe. Most of all, thanks for visiting Ramshackle Pantry.
Print
Cheez-It® Fried Cheese Sticks
- Prep Time: 15 minutes
- Inactive time: 2 hours
- Cook Time: 10 minutes
- Total Time: 25 minutes
- Yield: 24 Cheese Sticks
- Category: Appetizer
- Method: Frying
- Cuisine: American
Description
Cheez-It® Fried Cheese Sticks are a must-try for those who love mozzarella sticks, fried treats, or a wonderful appetizer. These are easy to make and bring a unique flavor to traditional snack.
Ingredients
- 12 mozzarella string cheese sticks
- 2 cup water
- 2 cup Cheez-It® crackers, crumbled finely with food processor or food mallet
- 1/2 cup Italian bread crumbs
- 1 cup all-purpose flour
- 2 eggs
- Oil, for frying
Instructions
- Cut 12 mozzarella string cheese sticks cross-wize to make 24 shorter sticks and place in a dish of water.
- Mix crumbled Cheez-It® crackers with Italian breadcrumbs in medium dish with cover and set aside
- Place all-purpose flour in a similar dish and set aside
- Place eggs in separate dish of similar size and set aside
- In small batches, remove mozzarella sticks from water and coat in flour.
- Remove from flour and coat with egg.
- Remove from egg and coat with Cheez-It® and breadcrumb mixture
- Place on parchment paper-lined baking sheet or something that will fit in your freezer.
- Repeat until all cheese sticks are coated.
- Place in freezer for 2 hours or more.
- When ready to cook, heat oil to 375° Fahrenheit.
- Depending on the size of your pot, add some of the cheese sticks to oil and cook for approximately 1 ½ minutes until golden brown, making sure not too much cheese leaks out. I cooked in three batches, but do what you are comfortable with and what is safe for you. (see notes for safety tips)
- Continue in batches until all are done.
- Serve with your favorite marinara sauce or dipping sauce.
Notes
- Always remember safety first and to check out the food safety instructions from the USDA.
- Use Mozzarella String Cheese and not fresh mozzarella or block mozzarella.
- Make sure to freeze for at least 2 hours before frying.
- You can bake these instead of frying, although they won’t be quite as crispy. I would suggest 10 minutes at 400° Farhenheit and place them on parchment paper.
- These are great for preparing beforehand. Once frozen, just place them in a freezer bag and cook when you are ready to try.
- Canola oil, corn oil, peanut oil, and sunflower oil are all appropriate for this. Any oil that has a high smoke point and can be used for deep fat frying.
- I estimated both the amount of oil that is absorbed and how much of the breading actually ends up on the cheese sticks.
Nutrition
- Serving Size: 6 sticks
- Calories: 619
- Sugar: 1 g
- Sodium: 727 mg
- Fat: 48 g
- Saturated Fat: 13 g
- Carbohydrates: 12 g
- Fiber: 1 g
- Protein: 28 g
- Cholesterol: 115 mg


My kid looooves Cheez-its, so this was a fun one to try and it is good. I even have started prepping these and putting them in the freezer so I can just pull them out and cook them. Great recipe.