This post may contain affiliate links. As an Amazon Associate I earn from qualifying purchases. Please read our disclosure policy.
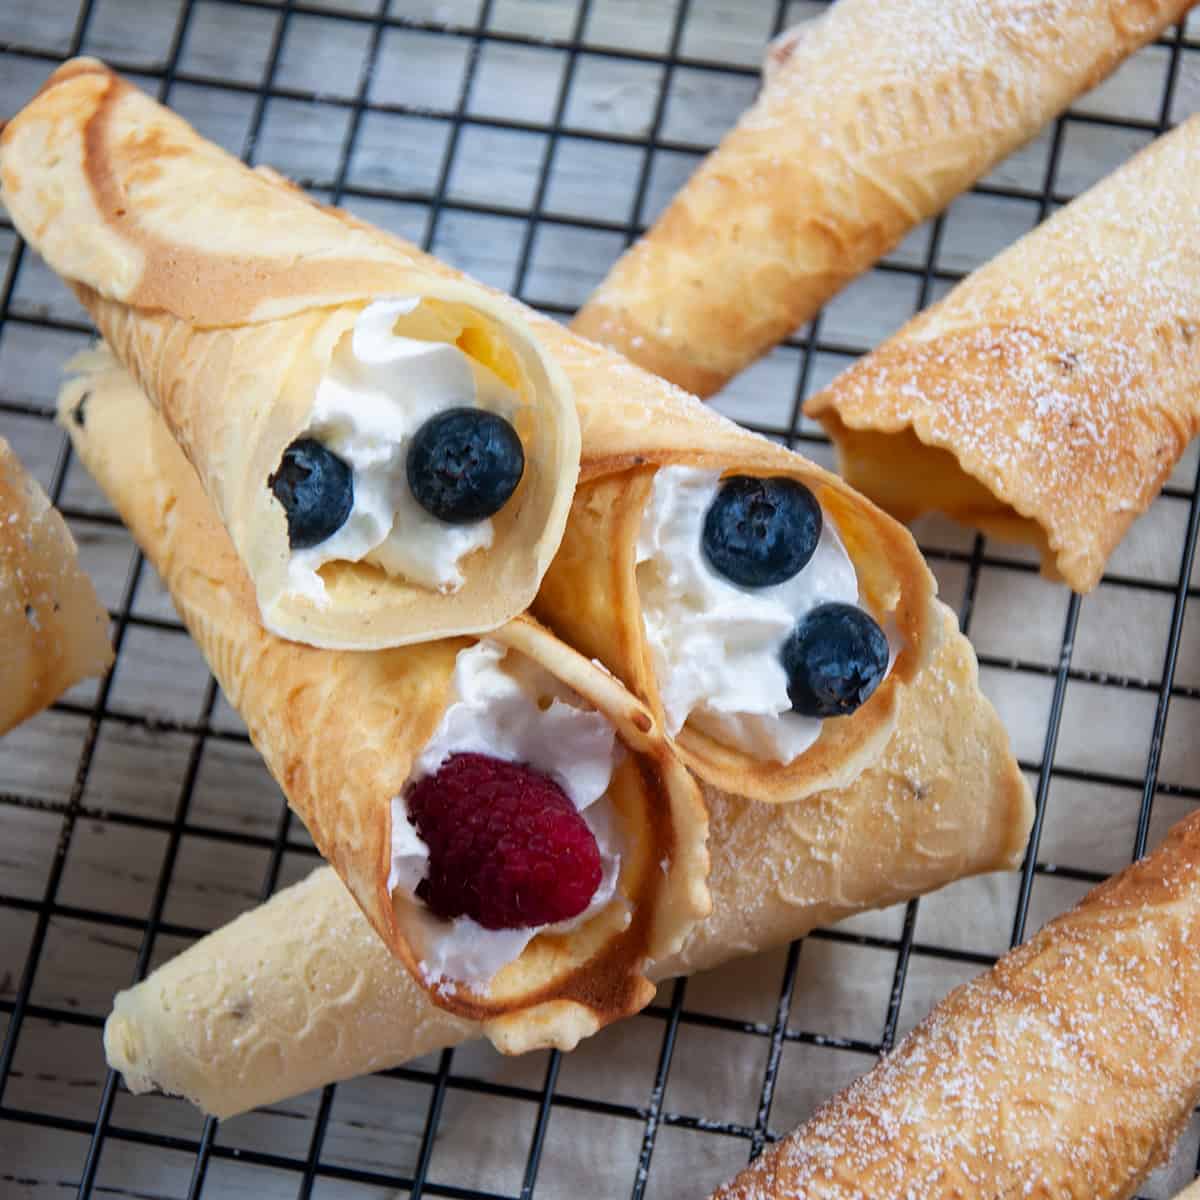
Krumkake is a delicious Norwegian dessert that is half cookie, half-waffle, and all tasty. Today, I am going to share my Norwegian Krumkake recipe.
Look at this beautiful cone treat with art designs cooked right into it! Whether this is a part of your holiday tradition or hungry for a beautiful dessert, this Krumkake recipe is for you!

🎉 What makes this recipe special?
What isn’t special? It is a traditional Norwegian Recipe and is loaded with heritage.
Making Krumkake can be a special family event. Eating them, even more so. I look at the history of this recipe and came up with what I believe is true to the tradition Norwegian Krumkake Dessert.
Then, there are the fillings. You can change this up and make it your own, but I love my Krumkake with whipped cream and fresh fruit.
If you are into Scandinavian desserts and comfort food, also check out this Rossette cookie recipe , Kringler cookies, these traditional German coconut macaroons, or Rømmegrøt. No matter what you make, make sure to treat yourself!
❓What Are Krumkake?
You probably already looked at the picture. Those are Krumkake. The word literally translates into ‘Curved Cake’, although I am not sure I would classify this as a cake.
They are crumbly like wafer cookies but cooked like a waffle. It can be served alone, but it is often filled with whipped cream and topped with fruit or chocolate.
Like a waffle, it has a specialty iron that you need to make it. If you are reading this, there is a reasonable chance that you already have a krumkake iron or one was gifted to you. Today hopefully, we will put it to good use!
If you don’t have one, now is a great time to buy a krumkake iron (AFFILIATE LINK) or maybe you just want to learn about this Norwegian heritage recipe. Whatever your reason, today we will celebrate this delicious Norwegian dessert!
🍦 Ingredients
This shares ingredients with many great cookie recipes, but has some unique stuff in there, too! here is the full list:
- All-purpose flour
- Sugar
- Corn starch
- Crushed cardamom
- Eggs
- Heavy whipping cream
- Vanilla extract
- Butter
See the recipe card for quantities.
Cardamom in Krumkake
Cardamom is prominent in Norwegian baking and I find it so interesting, as it is not native to the region. I previously included cardamom in my Holiday Glogg Recipe and explored the connection in that recipe.
Cardamom is related to ginger and has its origins in India.
Most likely, because of historical trading routes, it found its way to the northern regions, and they must have loved it. Supposedly, Norwegians consume 30 times more of the amount of cardamom than an average person.
My Krumkake recipe has cardamom in it. If it is not a flavor you like, it can be something you can omit.
That said, I feel like it adds a beautiful touch of flavor that helps make this already unique dessert a bit more special. If you don’t know where to find cardamom, check out your local grocery story (mine has it), or order some cardamom online(AFFILIATE LINK).
Krumkake Irons
As stated, you do need a special iron to make these cookies. That said, it is a gorgeous little cookie that is really fun to bring out during the Christmas season, and share these treats with your friends and family. I feel that Krumkake can be part of a tradition, and having an iron just means you can help build or carry on that tradition.
Initially, they were irons placed on the stovetop, and you had to flip them over to cook both sides. Perhaps you have one of those, but there are modern Krumkake Irons that can be plugged right in, have automatic preheat and timers, and, best of all, non-stick. I used a Cucina Krumkake Iron (Affiliate Link) in making our Krumkake.
Irons could be of different sizes, designs, and heating capabilities. That is ok.
The thing about your equipment is that you have to get to know it. Today, I am providing a recipe and process for you to make this delicious recipe. Still, part of making Krumkake is understanding and learning about your equipment.
Every krumkake iron will have differences that can affect your cook, so if your first cookies are not perfect, that is ok. For example, some recipes call for cooking just a few seconds on each side. I don’t need to flip anything for my iron, but it takes a full minute and thirty seconds to get a desirable golden brown crisp on my Krumkake.
On my Krumkake Iron, I clocked the surface temperature anywhere between 330° Fahrenheit and 360°. My experience was that the hotter the iron was, the better.
Allowing the iron to heat up by closing it between cooks helped ensure I got that golden brown color I was looking for.
You should adapt to make sure your Krumkake is best for you and adapt your process so that you can best use your special snowflake of a krumkake iron.
Should you Purchase a Krumkake Iron?
This delicious Norwegian treat comes with a little bit of an investment in purchasing an iron. The case I would make for buying one of these Krumkake irons is that you are investing in tradition.
Perhaps it is a tradition from your family, but maybe it is a tradition you are trying to create. Whether you are Norwegian or not, these are beautiful little cookies. Making them can be a fun exercise in cooking and enjoying the treats with your family or friends.
This is the krumkake iron I am using, and it has worked very well, but find what you want to use and go with that. I commend you if you prefer the old style (which probably has some issues like sticking and heating). I am using this new iron style for this recipe to get the job done.
🍲 Instructions
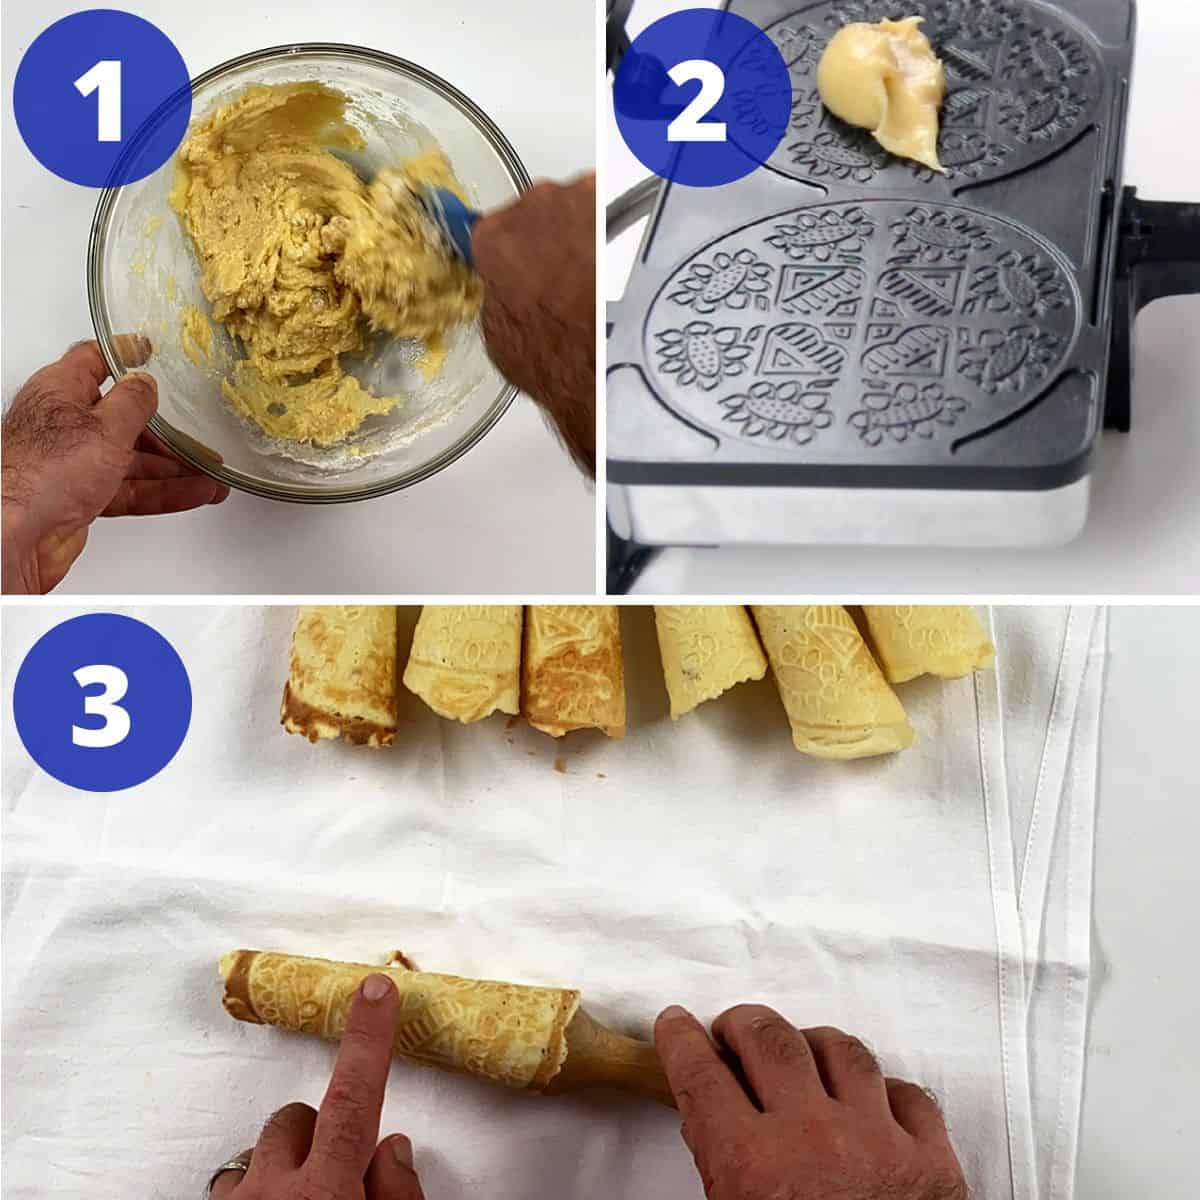
This batter is straightforward. Just a few ingredients, and once it is mixed together, the batter should be a consistency that might resemble creamy peanut butter.
I mix the wet ingredients in one dish, then mix the dry in another, and then combine. There is nothing all that unique about this batter except maybe cardamom.

Do You Have Two Spots For Cooking?
The iron I use has two places for cooking Krumkake. Still, I would advocate using one until you feel comfortable with your equipment. Yes, it is a time saver to cook two at a time! I recommend using one with your first batch or two on a new piece of equipment.
This lets you know the process and helps you find your process in making these cookies. Once you have that down, perhaps you prefer to use both sides. It is a time-saver, notably if you are doubling or tripling the recipe for a large family event.
Shaping These Cookies
Once the Krumkake are cooked, you then shape them into cones. Your iron should have come with a cone maker, but you can order them separately online. All it is is a cone-shaped device that we wrap our waffles around.
After several seconds, the cookie will turn from pliable and shapable to a hard cone. Your goal in that limited time is to wrap it around the cone device and make a krumkake! While you do have some time once they are cooked to get everything squared away, you also want to move quickly.
A note of caution is that these cones can be hot during this time. The waffles off the iron can be a bit of a challenge if you are sensitive to heat. Perhaps you have a set of food-safe gloves that can help.
I had a friend recommend wrapping a few fingertips with tinfoil. You could keep a dish of cool water close to your station to cool down your fingers.
I do not need any of these things, but rest assured, it isn’t because I am a tough guy. I have played a bit of hot potato a few times with these, but generally, I have felt that the hot cookies could still be handled. If you think otherwise, hopefully, those tips can help make the heat more bearable.
Do These Need To Be Cones?
No. If you want them flat, make them flat! It is that simple. I could see the case for leaving these flat, but the traditional way to make these is to turn them into cones. It makes them more portable and has a holder for any filling you might want to add.
Fillings and Toppings
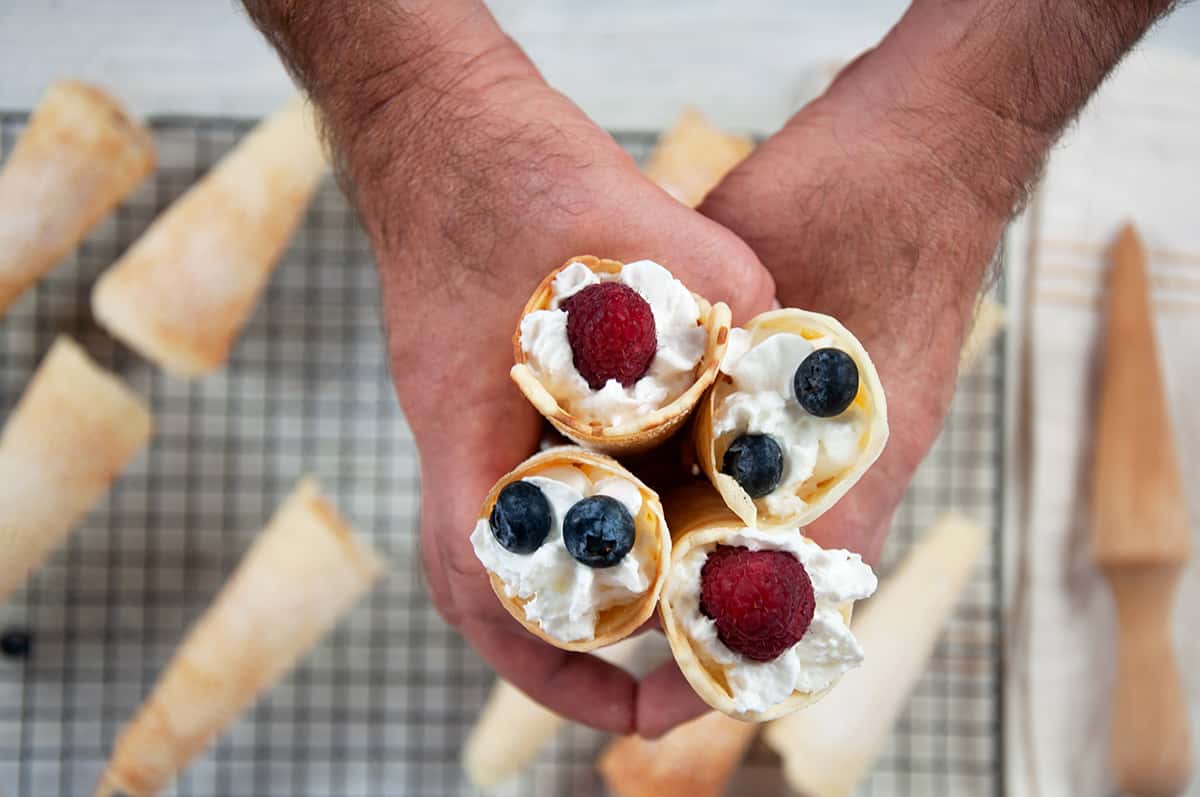
These cookies can stand independently, but cones are just begging to be filled. So, we filled them, and this is an excellent opportunity to make this recipe your own. We use whipped cream, raspberries, and blueberries for our Krumkake, but you don’t have to stop there.
Chocolate might make for a great topping, along with whipped cream, as well. Perhaps you could mix fruit preserves into your whipped cream and use that for your filling. I do have a homemade Whipped Cream recipe, but one that I think would work really good for this is the Kahlua Whipped Cream we used in our White Russian Coffee Recipe.
Really, there are many opportunities here, and if you can fit some kind of sweet goodness in the cone or dip the cone in it, it will probably work.
🤷 Substitutions and variations
There are a few ways that this can be changed up.
- Cardamom – Omit if you can’t find it or don’t like that flavoring.
- Filling – This really is a whole world you can experiment with. I love using whipped cream and fresh fruit, but really any dessert topping is a free game!
📦 Storage
Keep in an airtight container for up to 3 days, but I recommend eating them up as soon as possible.
🎓 Origin and History of Krumkake
I had a tough time finding information on where this originated. Still, the one marker that makes this recipe stand out is its specialized iron. So, at whatever point in history this started being made, they would have had the tools, free time, and resources to utilize and make these specialty items.
I did find this piece that The Smithsonian has a record of , which is a krumkake iron from 1946. I was made in Minneapolis, MN by Nordic Ware, where you can still purchase old-fashioned krumkake irons.
Krumkake certainly goes back farther than that, however.
I also found a recipe from the 1920s in an old cookbook, which dates it back a bit earlier. We know, however, that the Krumkake goes back further than that.
Wikipedia has a picture of a krumkake iron from the 1800s, bringing us back further. While I could not find much more prior to this, I think the 1800s seems reasonable when treats like this became more common, as stovetops were becoming more commonplace inside the home.
If you have any information about the history of Krumkake, I would love to hear about it in the comments section below!
❓ FAQ
A Krumkake iron is a specialized tool to cook Krumkake cookies! Originally, it was a manual iron, but now they make electric ones that work really good.
You eat them right away or store them in a airtight container
Krumkaka is Norwegian, but the areas are close and often shared food and culture.

📝 Tips and tricks
- Learn your equipment. Different Krumkake irons require other cook times.
- Close your iron between each Krumkake to help it heat back up.
- Those krumkakes can be pretty hot when they are just off the iron. Just know that. It is like playing a bit of hot potato… or hot Krumkake I suppose
- While I filled with whipped cream and topped with fruit, explore your toppings!
- These do get crumbly when eating. Enjoy the crumble.
- These surely won’t last long, but you can keep in a tight plastic container for several days.
🛠 Products used in this recipe
😋 Did you make this recipe?
That is awesome, and thank you so much for giving this Krumkake recipe a try. If you could leave a rating in the comment area below, it would be greatly appreciated. This lets me know how I am doing and also helps others decide if they want to make this recipe. Most of all, thanks for visiting Ramshackle Pantry.

Norwegian Krumkake
- Prep Time: 10 minutes
- Cook Time: 30 minutes
- Total Time: 40 minutes
- Yield: 14 Krumkake
- Category: Dessert
- Method: Iron
- Cuisine: Norwegian
Description
The Krumkake is a delicious holiday treat that is versatile, tasty, and a great way to celebrate Norwegian heritage. Great for Christmas, Thanksgiving, or just a fun treat for your family.
Ingredients
- ¾ cup of sifted all-purpose flour
- ½ cup sugar
- 1 Tablespoon cornstarch
- ¼ teaspoon crushed cardamom
- 2 eggs
- 2 Tablespoons heavy whipping cream
- ½ teaspoon vanilla extract
- 4 Tablespoons melted butter, but not hot
Instructions
- Add flour, sugar, cornstarch, and cardamom to large bowl. Mix well.
- In smaller bowl, beat eggs and then add cream, vanilla, and butter. Mix well
- Add liquid mixture into dry mixture and combined until a smooth peanut butter like consistency
- Preheat krumkake grill
- Each Krumkake will require about 1 ½ tablespoons of batter. Add one to your Krumkake maker and cook until golden brown. For my tool, this is about 1:30 seconds.
- Remove with fork and use Krumkake tool to form into cone before it cools down
- Allow grill to heat back up, repeat until batter is gone
- Sprinkle with powdered sugar. Fill with whipped cream and fruit. Eat!
Notes
- Learn your equipment. Different Krumkake irons require other cook times.
- Close your iron between each Krumkake to help it heat back up.
- Those krumkakes can be pretty hot when they are just off the iron. Just know that. It is like playing a bit of hot potato… or hot Krumkake I suppose
- While I filled with whipped cream and topped with fruit, explore your toppings!
- These do get crumbly when eating. Enjoy the crumble.
- These surely won’t last long, but you can keep in a tight plastic container for several days.
Nutrition
- Serving Size: 1 cone
- Calories: 100 Caloreis
- Sugar: 7 g
- Sodium: 11 mg
- Fat: 5 g
- Saturated Fat: 3 g
- Unsaturated Fat: 2 g
- Carbohydrates: 13 g
- Fiber: 0 g
- Protein: 2 g
- Cholesterol: 38 mg


They look beautiful.
Not interested in corn starch tho. Allergic.
Replace it with a bit of flour and give that a try. This should work. Your batter will be thinner and I use it to help keep the cookie crisp, but this should work.
Interesting. I will try this tonight. But I am considering an alternative to heavy cream.
The best recipe for Krumkake that I’ve found. My Norwegian grandmother used to make these cookies and I love, love, love them. Unfortunately I don’t have her recipe, not sure she ever wrote it down. But these sure taste like hers. Thank you!!!
I am so glad you liked them! No comment gets better than “It tastes like mom used to make!”